-
-
Notifications
You must be signed in to change notification settings - Fork 185
Installation sketch (standalone Arduino Uno Mega)
This installation method is designed to work with a single Arduino Uno/Mega, no special stuff needed (4 wires, 100nF capacitor). To install a bootloader in general you would need an ISP (In System Programmer). Most of you (me too) do not own a professional ISP so we will use a trick here.
A modified version of Nick Gammon's Atmega Board Programmmer is used here. In this case the 328/2560 (IO MCU) acts as ISP with a the HoodLoader2.hex preloaded in PROGMEM. It will then flash the 16u2 USB MCU.
First remove all hardware/wires/usb-cable from your Arduino to ensure nothing is messing up the upload. Never change wires when the devices are powered!
- Connect your Arduino to your PC
- Select the Arduino Uno/Mega board like you are used to (do not select 16u2).
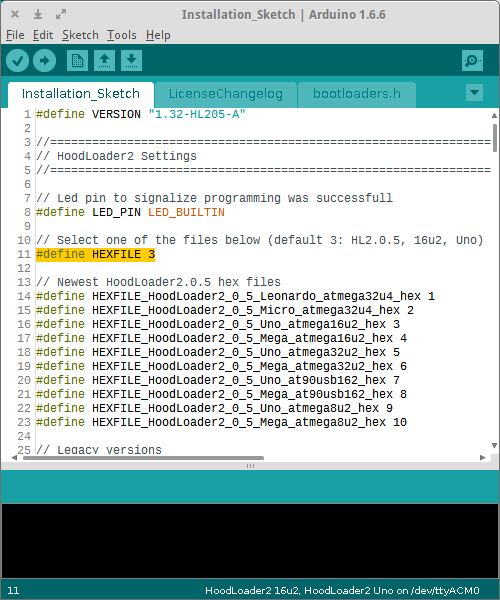
- Open the installation sketch
Installation_Sketch.ino - Edit the Settings if needed (for Uno, Mega, 8u2 or 32u2 board for example).
- Upload the installation sketch to your Arduino Uno/Mega (Ctrl + U).
- Wait until it says "Done uploading". This may take a while.
- Disconnect the Arduino from USB
Sketch might look different in newer versions

Connect all wires like in the picture below when the Arduino is plugged off. The 100nF capacitor is required. Lower/higher values might also work, it should just prevent the IO MCU from resetting. Double check connections!
Note: It might be possible that your ICSP header of the 16u2 is flipped 180 degrees on some unofficial boards.
Buttons 7 and 8 usage in the picture were removed in 2.0.5, you can ignore this.

100nF Capacitor:
328/2560 RESET - GND

Pin connections:
328/2560 - 16u2
MOSI     - MOSI
MISO     - MISO
SCK      - SCK
PIN 10   - 16u2 RESET
Once the installation sketch is uploaded to your main MCU you are able to burn the bootloader to your 16u2.
The installation sketch is designed to burn the bootloader without any user input. If you have wired up everything correct, plug your Arduino into the USB port and wait.
The Led will blink slow for 10 seconds. Then it will try to flash the bootloader. Wait until it is finished and the on board led will blink fast (every 100ms). Make sure to wait long enough so that the burning is finished 100%. (30s should be fine).
If the Led blinks slow (every second) the installation failed. It will try again programming in 10 seconds. For more help have a look here.
Now your Arduino should be flashed with the new bootloader if the Led blinks fast (every 100ms). To check your HoodLoader2 installation version read on here. If its not correctly installed read the instructions carefully and try again. But if everything is okay you may remove the wires now (plug it out first to not destroy anything).
Copyright (c) 2014-2021 NicoHood
Additional Information