-
Notifications
You must be signed in to change notification settings - Fork 43
Installation
Warning
❗️Don't install the userbot on recent registered accounts
-
API_ID- Get it from my.telegram.org -
API_HASH- Get it from my.telegram.org -
PM_LIMIT- set your pm permit warn limit -
DATABASE_URL- ONLY for MongoDB, your mongodb url -
DATABASE_NAME- set todb.sqlite3if want to use sqlite3 db else leave blank -
DATABASE_TYPE- set tosqlite3if want to use sqlite3 db else leave blank
-
STRINGSESSION- only If you want to use on cloud hosts use string_gen.py to generate OR
Important
STRINGSESSION is necessary for deployment through Docker/Cloud Host etc.
-
APIFLASH_KEY- If you want to use web screnshot plugin You can get it from here -
RMBG_KEY- If you want to use removbg plugin You can get it from here -
VT_KEY- If you want to use VirusTotal plugin You can get it from here -
GEMINI_KEY- If you want to use gemini ai plugin You can get it from here -
COHERE_KEY- If you want to use cohere ai plugin You can get it from here -
VCA_API_KEY- If you want to use ai tools like sdxl,upscale plugin You can get it from here
| Koyeb | Heroku | Render |
|---|---|---|
 |
 |
- YT Video [How to deploy on Koyeb]: https://youtu.be/2m_yB7EllYc
- YT Video by a user [How to deploy on Koyeb]: https://youtu.be/AmlFBZ26tY4?si=3buw5OCJ2wEz3tVJ
For most people above instrunctions are enough to deploy Moon-Userbot. Though if you still haven't been able to understand or deploy Moon-Userbot or maybe you're reading type person (like me), then continue reading.
- Go to Koyeb and sign up. Remember to use your real Gmail or your Github for it.
- Now you need to create a string session, watch this video to know how to create a string session.
- Now click on this link
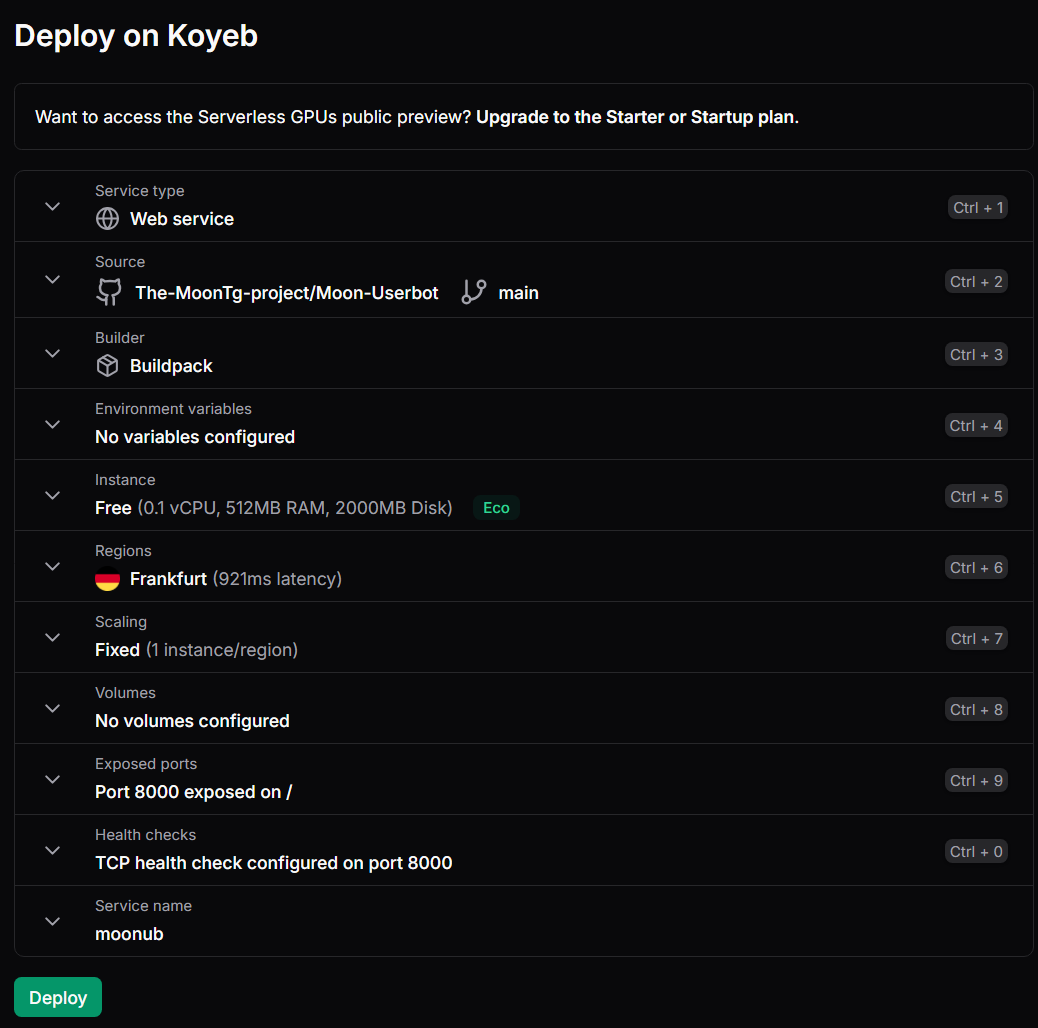
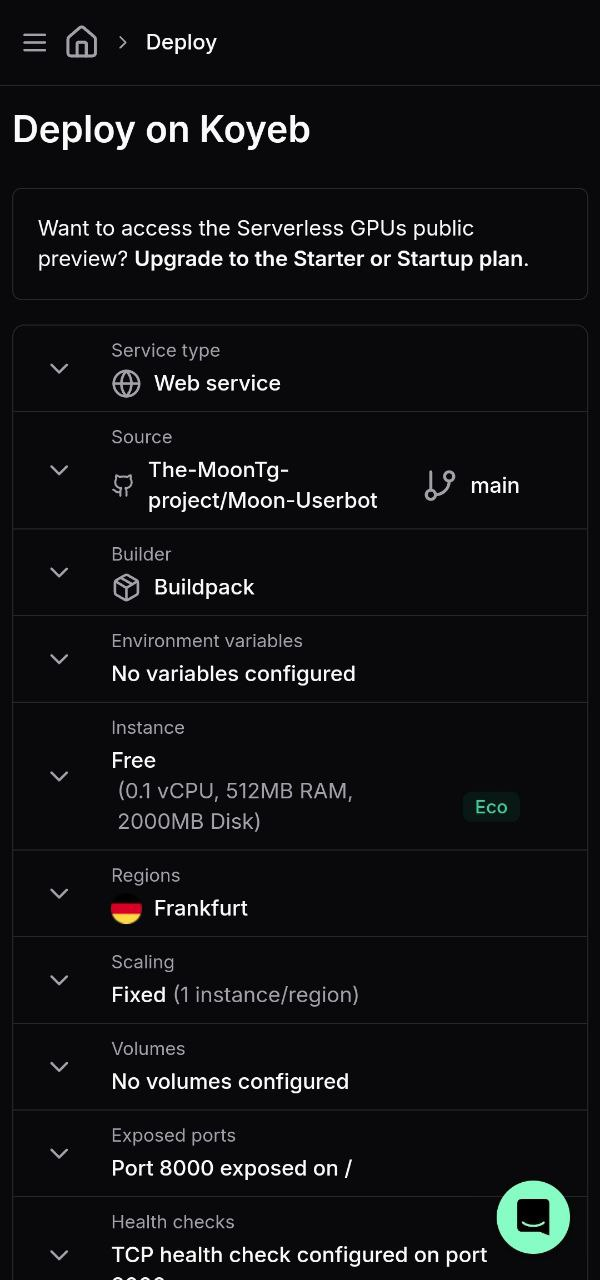
- You'll be redirected to Koyeb's Deploy page. It'll look like this:
| PC | Mobile |
|---|---|
 |
 |
- Now time to configue our environment variable:
- Click on
Environment Variables:
- Choose "Raw Editor":

- Now copy and paste this to the editor.
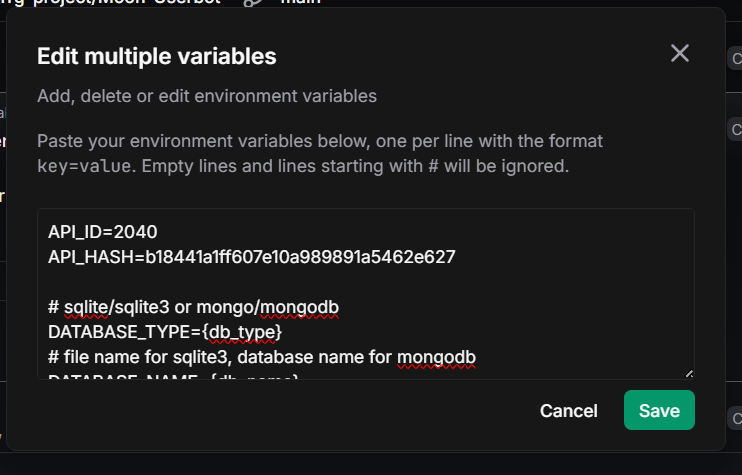
- Edit the variables with your own values.
⚠️ Do not remove any variable.⚠️ Just leave it blank if you don't want to use an optional variable.
- After that we need to also add one more variable for
PORTwith 8080 as value. Verify that you've 15 variables configured:

- Now comes builder part, for that we've two options: 1. Dockerfile 2. Buildpacks.

-
Dockerfile:
- Click on
Dockerfile:
- and override Dockerfile location:

- Click on
-
Buildpacks:
- Click on
Buildpacksand override the run command as below: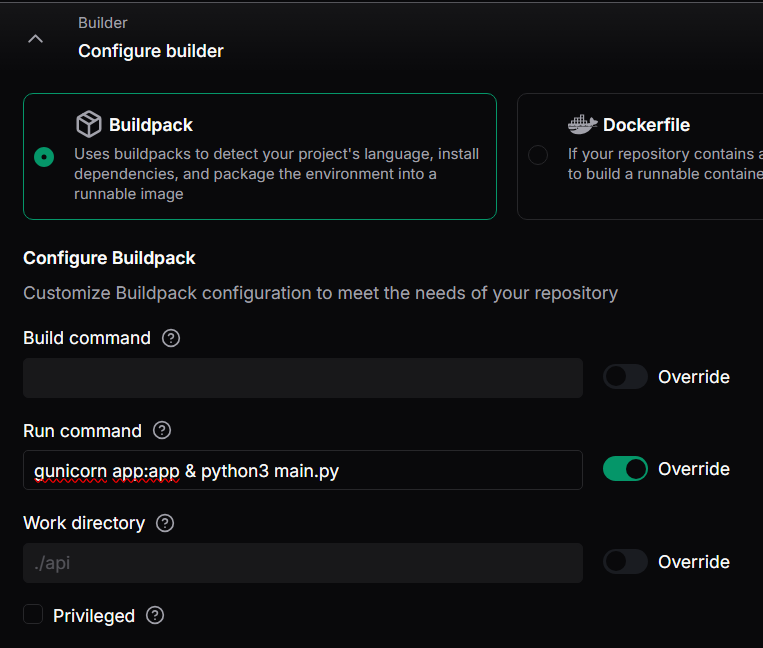
- Click on
- Choose region as Washingtion DC:
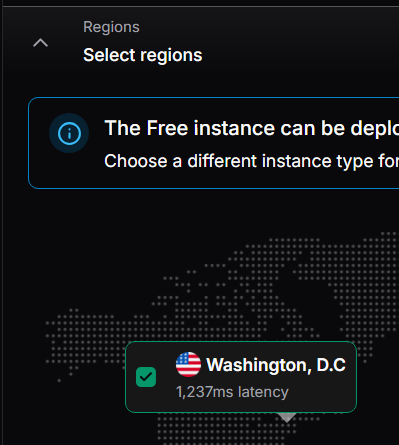
- Change Exposed Port to 8080:

- Now click on
Deployand wait for the build to finish. And 🥳 you're done.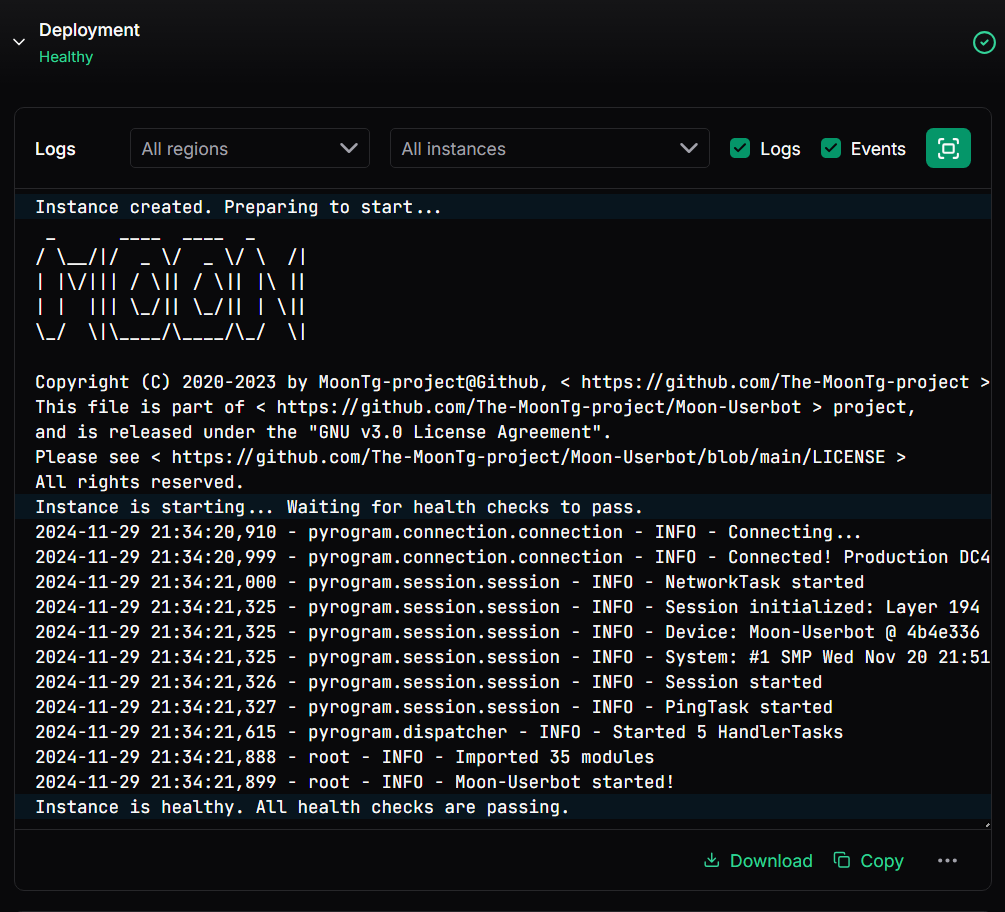
- Click on
If you're a premium user of Render, you can easily deploy Moon-Userbot on Render by clicking on the "Deploy to Render" icon above. The Moon repository contains a render.yaml file that is compatible with Render and has all the necessary settings. All you need to do is add a file in the environment section with the name .env and configure your variables in it.
Here are the detailed steps:
- You'll be redirected to Render's Deploy page.
- Now, you need to add your environment variables. Click on the "New Environment Variable" button.
- Copy and paste the contents of this file into the editor. This file contains all the necessary variables.
- Edit the variables with your own values.
⚠️ Do not remove any variable.⚠️ Just leave it blank if you don't want to use an optional variable. - After adding all the variables, click on "Add" to save them.
- Now, Render will automatically build and deploy your Moon-Userbot.
- Once the deployment is complete, you're done.
Heroku 💔 is no longer free. But you can still deploy Moon-Userbot on Heroku if you're paid user of it. Since we don't have any paid 💔 Heroku account, we can't provide you with a detailed guide. Feel free to contribute 💔 if you have a paid Heroku account and can help us with the guide.
We've already provided 2 Dockerfiles for you to deploy Moon-Userbot on Docker. You can choose either of them based on your preference. More details on README.
Instrunctions given on README is enough though if you still didn't 💔 understand, you can follow these steps:
- Download and install termux from f-droid (click (https://f-droid.org/en/packages/com.termux/))
- Copy this command and paste in termux:
pkg install wget -y && wget https://raw.githubusercontent.com/The-MoonTg-project/Moon-Userbot/master/termux-install.sh -O t-moonub.sh && bash t-moonub.sh-
Termux may ask permission to work in the background, you should allow it
-
Wait for the "Enter API_ID and API_HASH" message in the terminal. If you aren't a developer and do not understand what it means, just press Enter. Afterwards proceed with the follow up vars it asks for.
-
When it'll ask about database type ("Choose database type"), enter 2 and press Enter
-
Now you need to authorize your Telegram account. Just follow instructions that you'll see - literally enter your Telegram's phone number and press enter.
-
When it'll ask "Is correct? (y/N)", enter 'y'
-
You'll receive a message from Telegram with a confirmation code. You should copy it and enter it to the terminal when it asks "Enter confirmation code".
- If your account has a 2fa password, you'll be asked to enter it
-
Congrats! Userbot installed successfully. To start userbot, enter this command in shell:
cd Moon-Userbot/ && python main.py -
Switch to Telegram and enjoy 🎉
-
You need WSL feature enabled and install any WSL distro of your choice
-
Copy this command and paste it to WSL Terminal:
sudo apt update && sudo apt upgrade -y && sudo apt install git && git clone https://github.com/The-MoonTg-project/Moon-Userbot.git && cd Moon-Userbot/ && sudo bash install.sh-
Wait for the "Enter API_ID and API_HASH" message in the terminal. If you aren't a developer and do not understand what it means, just press Enter.
-
When it'll ask about database type ("Choose database type"), enter 2 and press Enter
- Those who know How-to's if want mongodb then they can use 1 option too
-
Now you need to authorize your Telegram account. Just follow instructions that you'll see - literally enter your Telegram's phone number and press enter.
-
When it'll ask Is correct? (y/N)" > enter 'y'
-
You'll receive a message from Telegram with a confirmation code. You should copy it and enter it to the terminal when it asks "Enter confirmation code".
- If your account has a 2fa password, you'll be asked to enter it
-
Congrats! Userbot installed successfully. To start userbot, enter this command in shell:
cd Moon-Userbot / && python main.py -
Switch to Telegram and enjoy :)
- Copy this command and paste it to Terminal:
sudo apt update && sudo apt upgrade -y && sudo apt install git && git clone https://github.com/The-MoonTg-project/Moon-Userbot.git && cd Moon-Userbot/ && sudo bash install.sh-
Wait for the "Enter API_ID and API_HASH" message in the terminal. If you aren't a developer and do not understand what it means, just press Enter.
-
When it'll ask about database type ("Choose database type"), enter sqlite option and press Enter
- Those who know How-to's if want mongodb then they can use 1 option too
-
Now you need to authorize your Telegram account. Just follow instructions that you'll see - literally enter your Telegram's phone number and press enter.
-
When it asks Is correct? (y/N) > enter 'y'
-
You'll receive a message from Telegram with a confirmation code. You should copy it and enter it to the terminal when it asks "Enter confirmation code".
- If your account has a 2fa password, you'll be asked to enter it
-
Congrats! Userbot installed successfully. To start userbot, enter this command in shell:
cd Moon-Userbot / && python main.py
- Switch to Telegram and enjoy :)
Moon-Userbot: Elevate Your Telegram Journey Beyond Limits!