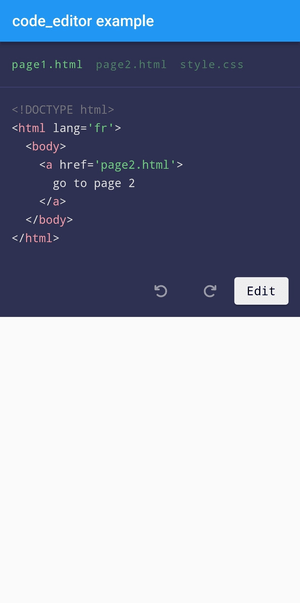
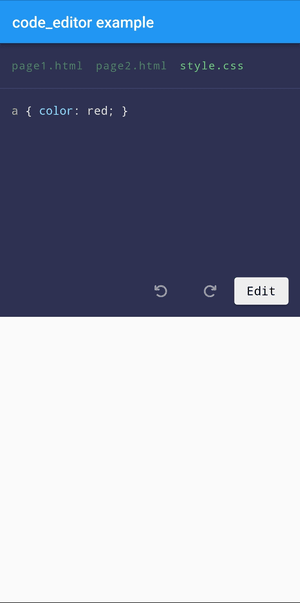
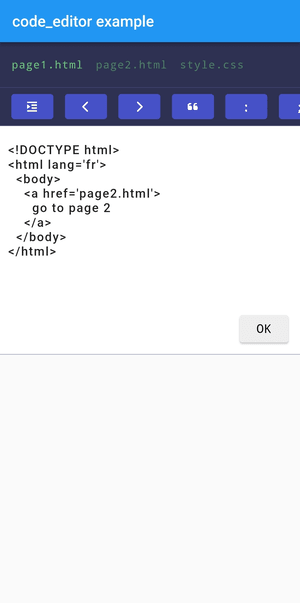
A code editor (dart, js, html, ...) for Flutter with syntax highlighting and custom theme.
This package is specially designed to make it easier to write code on mobile. It should work on other platforms as well, but that's not the goal. If you plan to build something just for the web/desktop, your users might suffer from the lack of features specific to those platforms.
List of supported languages: https://github.com/git-touch/highlight.dart/tree/master/highlight/lib/languages
The editor displays the contents of fictitious "files" that correspond to instances of FileEditor. Each file has properties: its name, its content and the language this file uses.
In other words, with this code editor, you can edit files which contain code. You can switch between the files in the navigation bar to edit their content with tools that make writing easier on phones. Once editing is complete, the code is highlighted according to the imposed theme (by default a custom one).
You can choose your theme or create your own by checking at import 'package:flutter_highlight/themes/github.dart';
It's very easy to install :
- Add in the pubspec.yaml file
dependencies:
code_editor: ^2.1.0- Don't forget to update the modifications of the pubspec.yaml file
$ flutter pub get
- Finally, use code_editor in your flutter project
import 'package:code_editor/code_editor.dart';After importing the package into your project, you can initialize an EditorModel to control the editor. If you use a Stateless widget, then declare this code in the build() function:
// example of a easier way to write code
// instead of writing it in a single string
List<String> contentOfPage1 = [
  "<!DOCTYPE html>",
  "<html lang='fr'>",
  "\t<body>",
  "\t\t<a href='page2.html'>go to page 2</a>",
  "\t</body>",
  "</html>",
];

// The files displayed in the navigation bar of the editor.
// There is no limit.
// By default:
// [name] = "file.${language ?? 'txt'}"
// [language] = "text"
// [code] = ""
// [readonly] = false
List<FileEditor> files = [
  FileEditor(
    name: "page1.html",
    language: "html",
    code: contentOfPage1.join("\n"), // [code] needs a string
  ),
  FileEditor(
    name: "page2.html",
    language: "html",
    code: "<a href='page1.html'>go back</a>",
    readonly: true, // this file won't be editable
  ),
  FileEditor(
    name: "style.css",
    language: "css",
    code: "a { color: red; }",
  ),
];

// The model used by the CodeEditor widget,
// you need it in order to control it.
// But you can use `CodeEditor.empty()` if you don't want to use a model.
EditorModel model = EditorModel(
  files: files, // the files created above
  // you can customize the editor as you want
  styleOptions: EditorModelStyleOptions(
    fontSize: 13,
  ),
);

// /!\ important to use a `SingleChildScrollView`
// because of the telephone keypad which might cause a
// "RenderFlex overflowed by x pixels on the bottom" error
return SingleChildScrollView(
  child: CodeEditor(
    model: model, // the model created above
    disableNavigationbar: false, // hide the navigation bar ? default is `false`
    // when the user confirms changes in one of the files:
    onSubmit: (String language, String value) {
      print("A file was changed.");
    },
    // the html code will be auto-formatted
    // after any modification to an HTML file
    formatters: const ["html"],
    textModifier: (String language, String content) {
      print("A file is about to change");

      // transform the code before it is saved
      // if you need to perform some operations on it
      // like your own auto-formatting for example
      return content;
    }
  ),
);However, if you are using a Stateful widget, declaring the model in the build() function would cause the entire editor to go back to its initial state as soon as you update the state of something else in your widget. As a consequence, when using the CodeEditor in a Stateful widget, you want to declare the model in initState():
class _HomePageState extends State<HomePage> {
  late EditorModel model;

  @override
  void initState() {
    super.initState();
    List<String> contentOfPage1 = [
      "<!DOCTYPE html>",
      "<html lang='fr'>",
      "\t<body>",
      "\t\t<a href='page2.html'>go to page 2</a>",
      "\t</body>",
      "</html>",
    ];

    List<FileEditor> files = [
      FileEditor(
        name: "page1.html",
        language: "html",
        code: contentOfPage1.join("\n"),
      ),
    ];

    model = EditorModel(
      files: files,
    );
  }

  @override
  Widget build(BuildContext context) {
    return Scaffold(
      appBar: AppBar(title: const Text("code_editor example")),
      // /!\ The SingleChildScrollView is important because of the phone's keypad which causes a "RenderFlex overflowed by x pixels on the bottom" error
      body: SingleChildScrollView(
        child: Column(
          children: [
            CodeEditor(
              model: model,
              formatters: const ["html"],
            ),

            // Some code below that updates the state of the entire widget
            // ...
          ]
        ),
      ),
    );
  }
}
For the style options, you have a lot of possibilites :
// The class, to show you what you can change.
// To know what those options do exactly,
// please refer to the comments in the code itself.
class EditorModelStyleOptions {
  final EdgeInsets padding;
  final double heightOfContainer;
  final Map<String, TextStyle> theme;
  final bool showUndoRedoButtons;
  final String fontFamily;
  final double? letterSpacing;
  final double fontSize;
  final double lineHeight;
  final int tabSize;
  final Color editorColor;
  final Color editorBorderColor;
  final Color editorFilenameColor;
  final Color editorToolButtonColor;
  final Color editorToolButtonTextColor;
  final double? fontSizeOfFilename;
  final TextStyle textStyleOfTextField;
  final Color editButtonBackgroundColor;
  final Color editButtonTextColor;
  final String editButtonName;
  final bool reverseEditAndUndoRedoButtons;
  final ToolbarOptions toolbarOptions;
  final bool placeCursorAtTheEndOnEdit;
  final bool removeFocusOfTextFieldOnTapOutside;
}
Change the position of the edit button ("Edit") with :
// inside EditorModelStyleOptions:
styles.defineEditButtonPosition(bottom: 10, right: 15) // default values
Chain the calls like this if needed instead of creating a temporary variable:
EditorModel model = EditorModel(
  files: files,
  styleOptions: EditorModelStyleOptions(
    showUndoRedoButtons: true,
    reverseEditAndUndoRedoButtons: true,
  )..defineEditButtonPosition( // yes with 2 dots
    bottom: 10,
    left: 15,
  ),
);code_editor uses the following dependencies to work:
- flutter_highlight
- font_awesome_flutter
Do not hesitate to contribute to the project on GitHub :)
MIT License


