-
Notifications
You must be signed in to change notification settings - Fork 9
Including the WPF Application in the Vts Solution
Lisa Malenfant edited this page Nov 9, 2023
·
12 revisions
Some of our repositories reference the VTS Library from NuGet and it can be useful to pull these into the VTS solution to reference the library directly. This can help when making changes to the VTS Library that will be used in the application or for testing and validation purposes. Here are the steps to include the WPF GUI in the VTS Solution.
- Clone the Vts Solution.
- Clone the WPF Solution (can be into the same folder or a separate one).
- Open the Vts Solution:
- In Visual Studio open the solution \Vts\src\Vts.sln
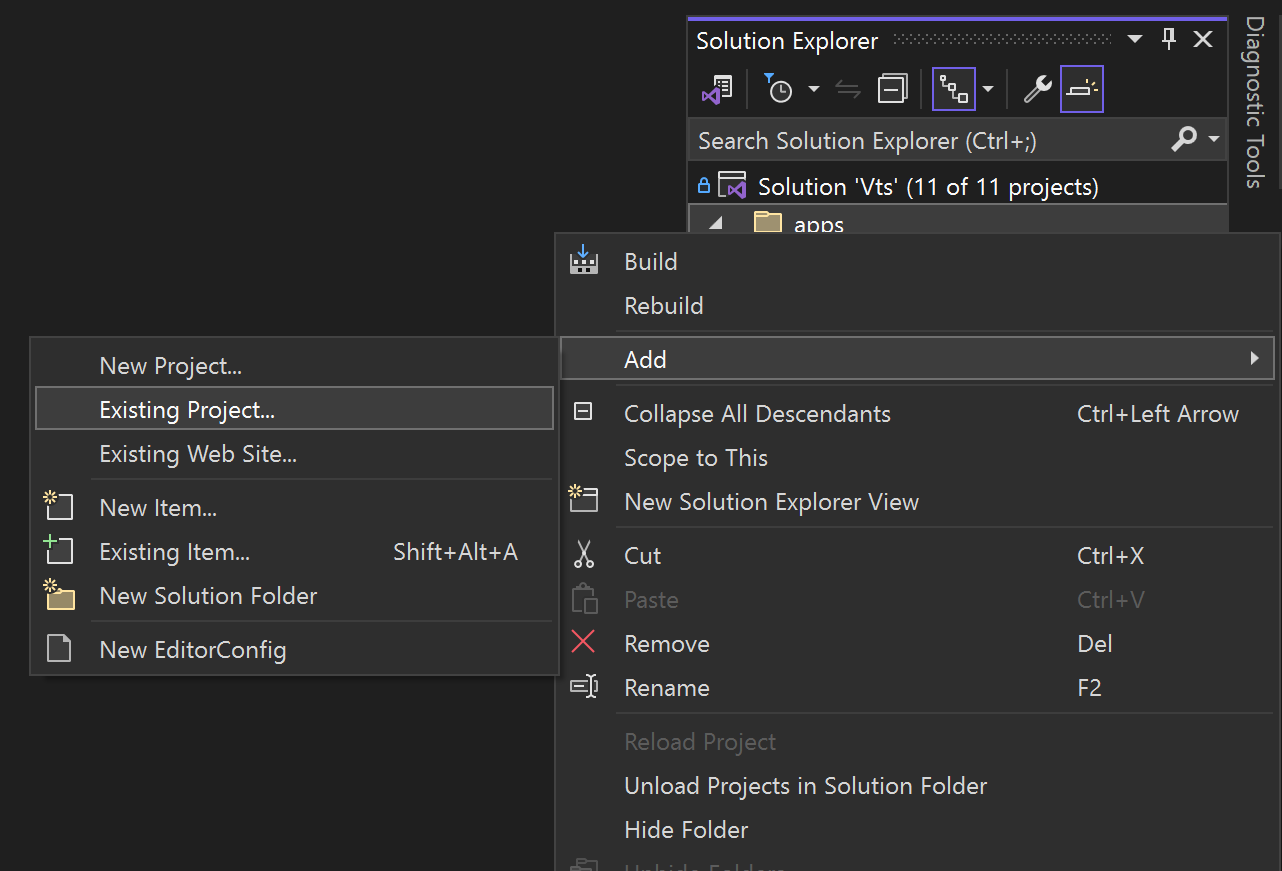
- Click on the ''apps'' folder or you can create a ''gui'' folder and select "Add" > "Existing Project..."

- Browse to the Vts.Gui.Wpf folder and add the Project file ( \Vts.Gui.Wpf\Vts.Gui.Wpf\Vts.Gui.Wpf.csproj ).
- Click on the ''tests'' folder and select "Add" > "Existing Project..."
- Browse to the Vts.Gui.Wpf.Test folder and add the Project file ( \Vts.Gui.Wpf\Vts.Gui.Wpf.Test\Vts.Gui.Wpf.Test.csproj ).
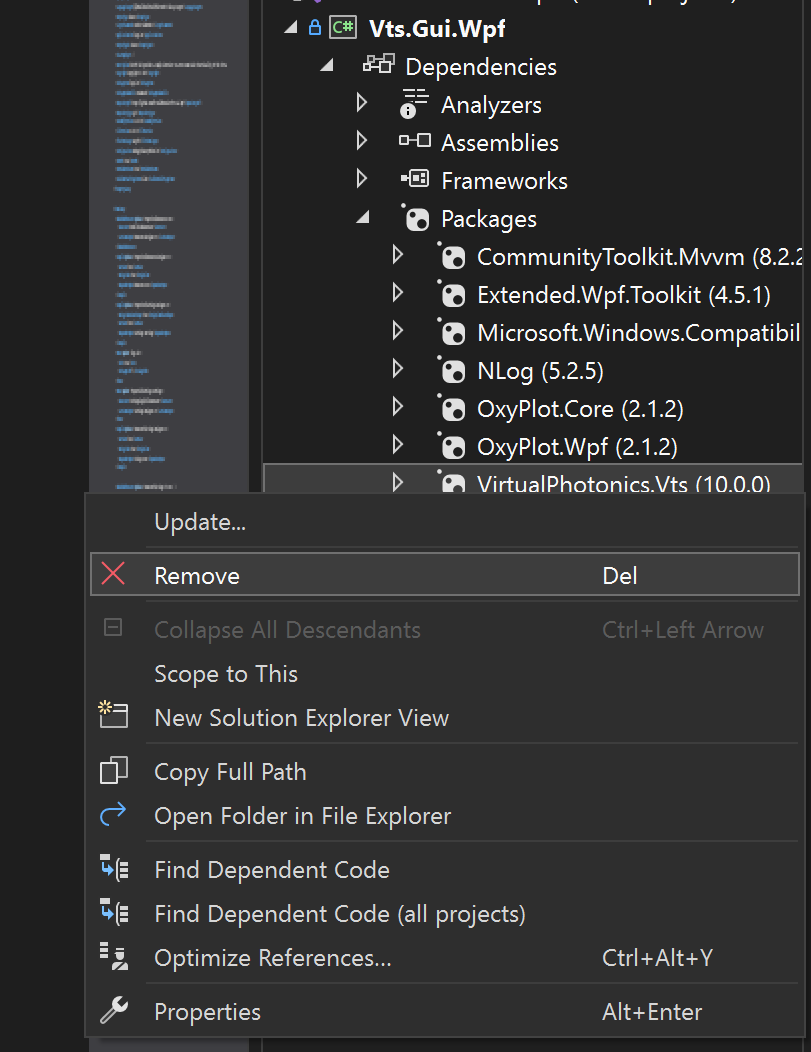
- In the Vts.Gui.Wpf & Vts.Gui.Wpf.Test projects, remove the reference to Vts (this it the NuGet reference)

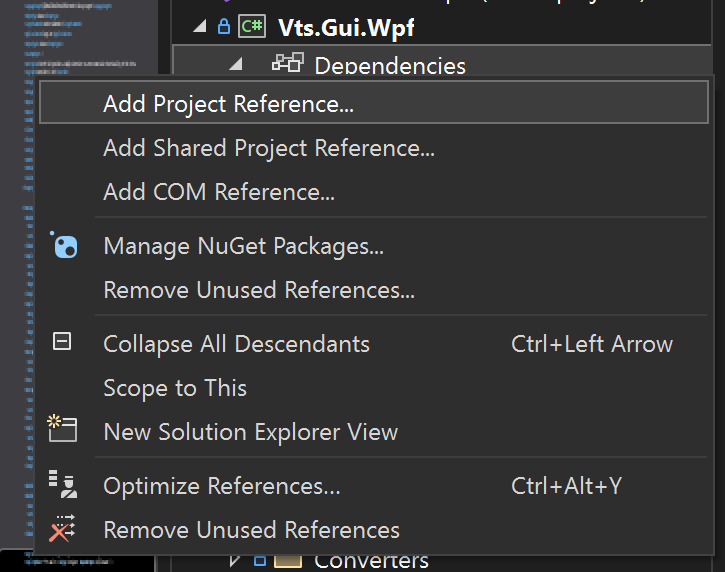
- Add in a project reference:
- Click "Add Project Reference..."

- Select Projects and click the checkbox next to Vts
- Rebuild the solution.
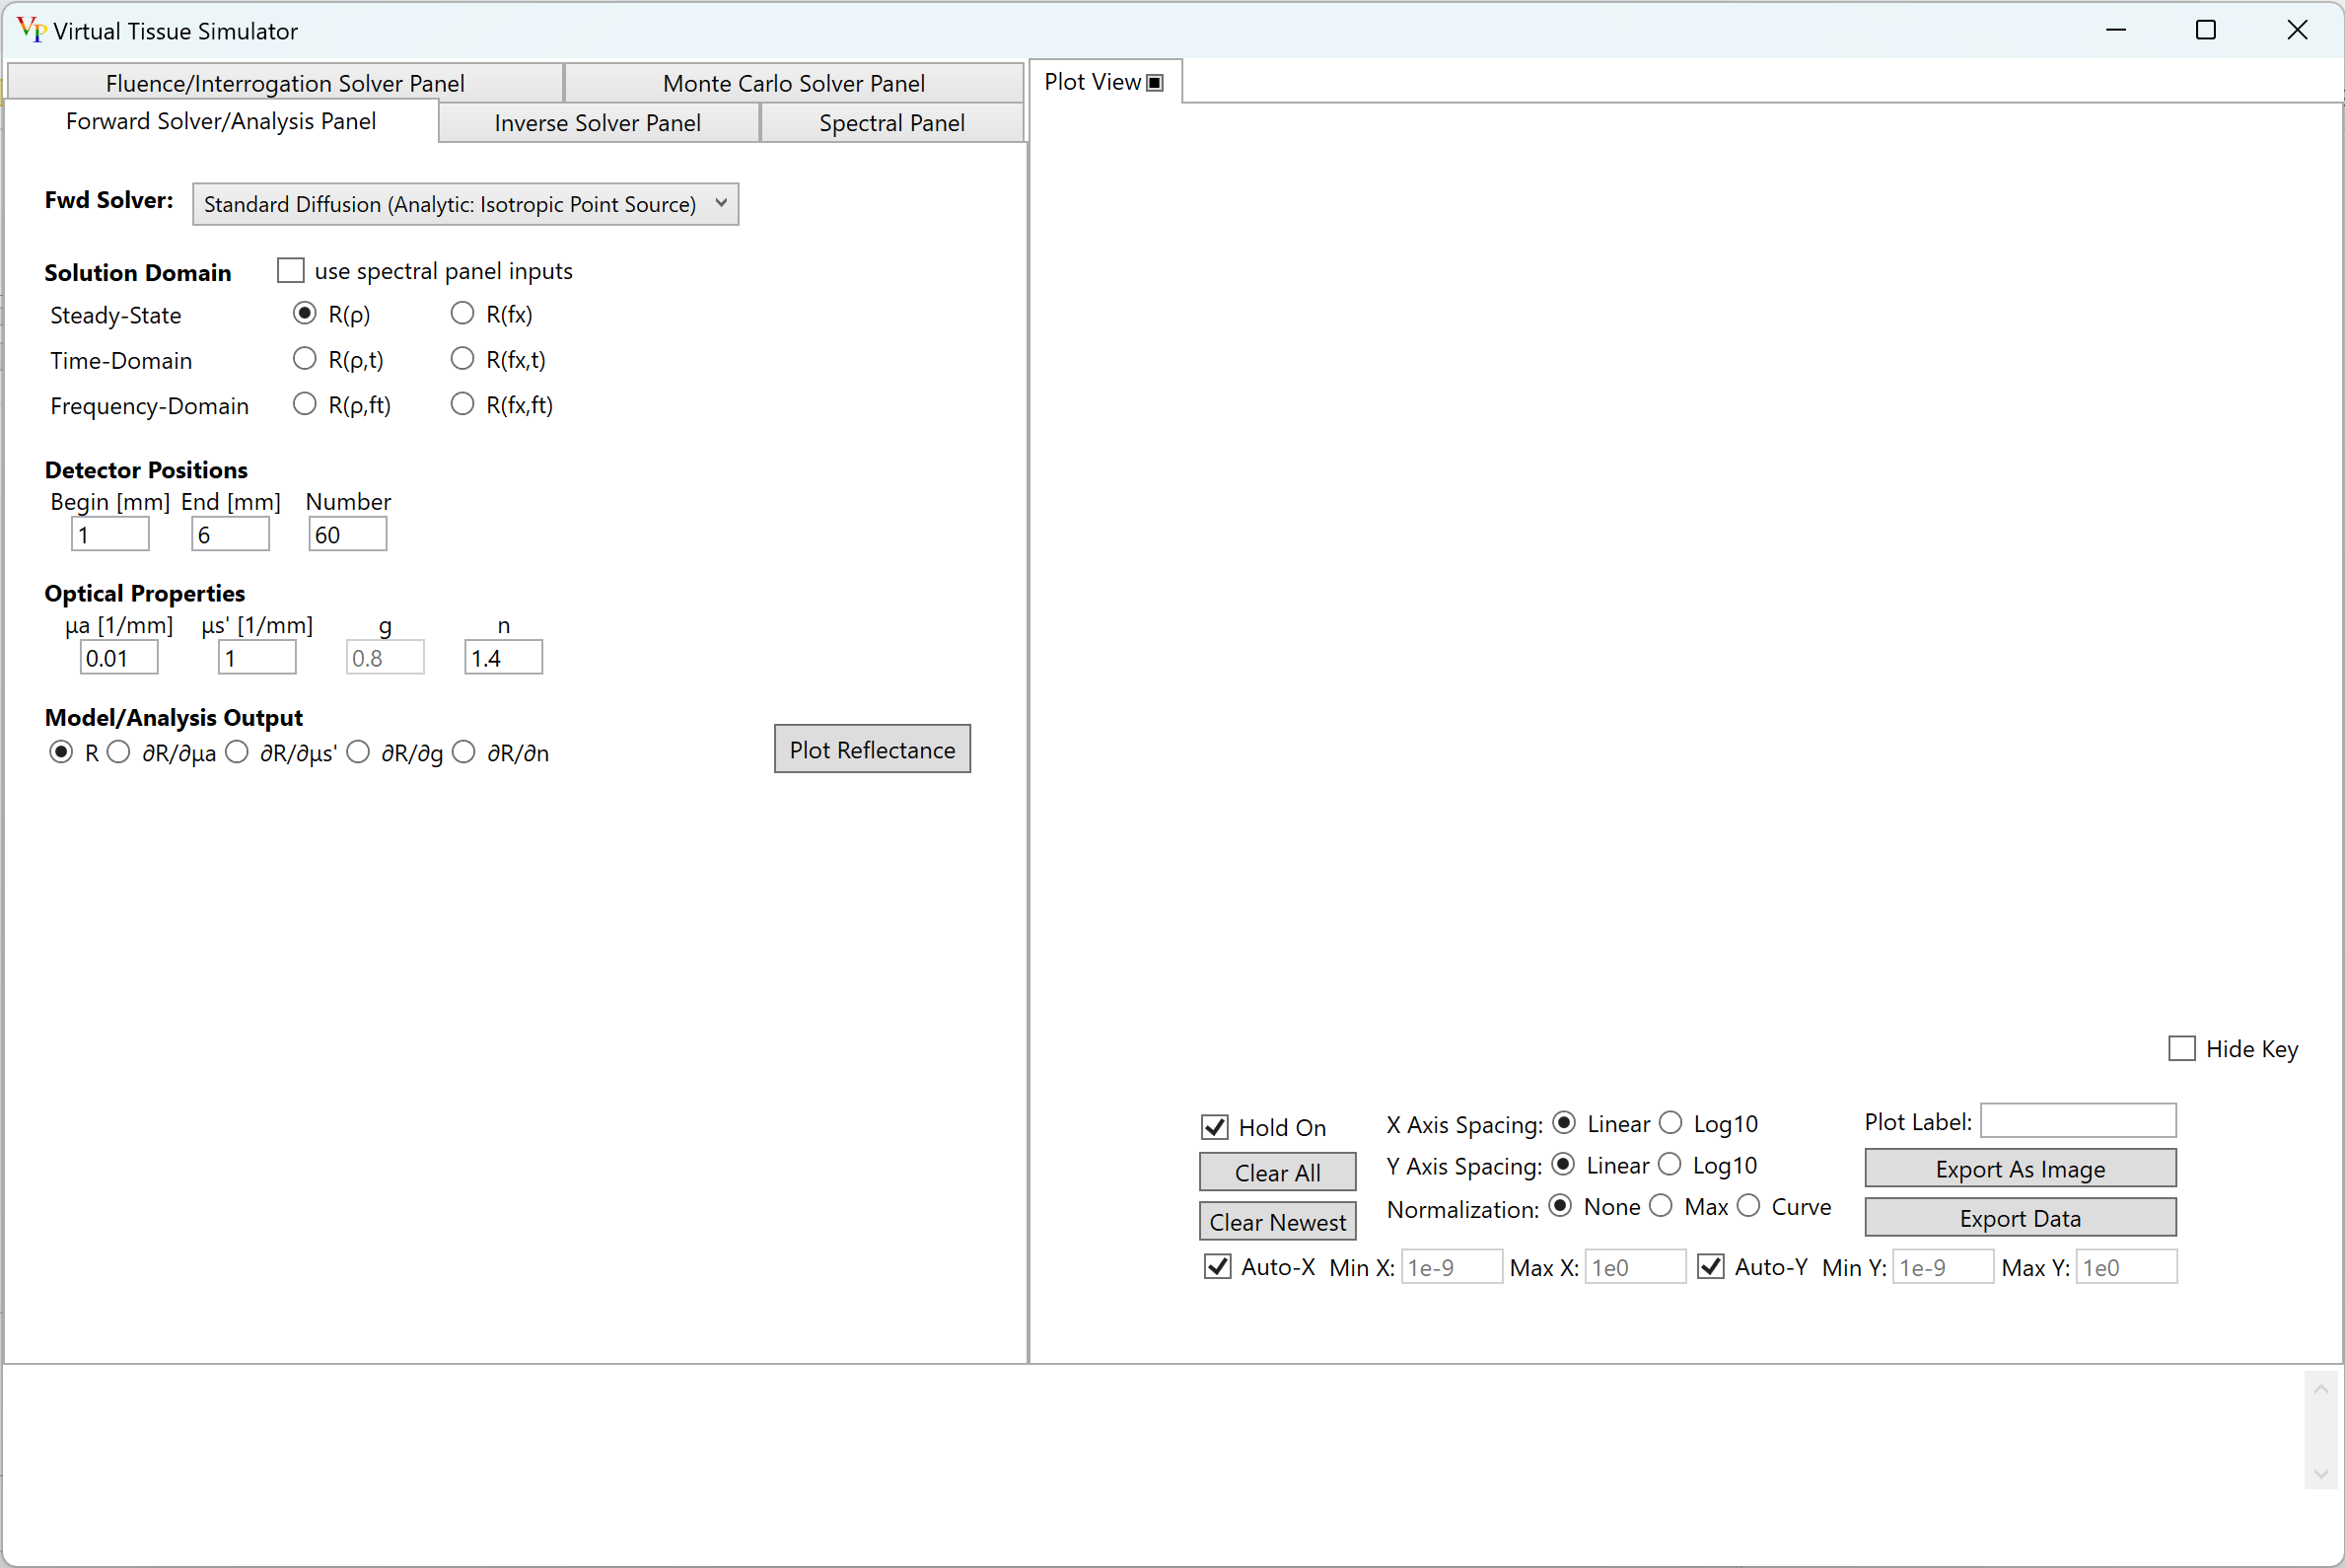
- To set Vts.Gui.Wpf as the startup project, right click and select "Set as StartUp Project".
- Either hit CTRL + F5 or go to "Debug" > "Start Without Debugging"

NOTE: To bring in other projects and test projects simply follow these directions for the .csproj files of your choice, this can also be done with your own projects. To avoid adding any of these projects to the solution, commit any modified library files but omit the Vts.sln file.
Virtual Photonics Technology Initiative
Project Site | Discussion | Education